    /***
* Cache缓存管理
* @param type[string] eq-赋值/add-字符串增加/push-数组增加/extend-对象合并]
*/
function c( name, val ,type){
  //默认操作
  var type = type || "eq";
  //创造缓存空间
  if(typeof CACHE != "object"){CACHE={};}

  //指针定向到缓存
  var result = CACHE;

  //点语法,最终找到相关位置的父级
  if(name.match(/\./g)){
    var arr= name.split(".");
    arr.map(function(ele,ind){
      if(ind == arr.length -1 ){name = ele;return;}
      result = result[ele];
    })
    //找不到数据未定义
    if(!result){return false;}
  }

  //理解请求的操作
  var val_type = typeof val;
  var name_type = typeof name;
  //--理解为读取指定缓存 的逻辑
  if(val_type == "undefined"){return result[name];}
  //--理解为读取整个缓存 的逻辑
  if(name_type == "undefined"){return result;}

  //--下面是 对缓存进行操作的逻辑
  //-- -- 定义操作函数
  //-- -- --赋值
  function eq(){
    result[name] = val;
    return result[name];
  }
  //-- -- --字符串增加
  function add(){
    result[name] = (result[name])? result[name] + val : val;
    return result[name];
  }
  //-- -- --数组增加
  function push(){
    result[name].push( val );
    return result[name];
  }
  //-- -- --对象合并
  function extend(){
    if(typeof result[name] == "obj"){
      $.extend(result[name], val);
    }else{
      eq();
    }
    return result[name];
  }

  //-- -- 执行相关操作
  try{
    var run = `result= ${type}();`;
    eval(run);
  }catch(e){
    console.log(e);
    console.log(run);
    //操作失败返回错误
    result = false;
  }

  return result;
}
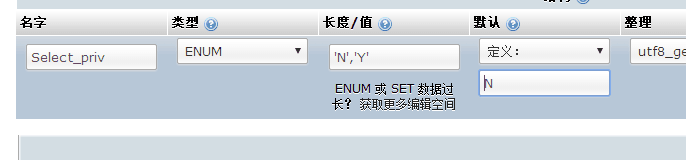
mysql 数据库只允许 某字段保存固定值
php 我写的垃圾工具函数 data_fromat
<
pre class="lang:php decode:true">
/**
* data_fromat格式化数据
*@param $origin 原始数组 默认字段
*@param array $field_default 需要提取作为第一级的字段的键 (这个数组第一个参数应该是id这种唯一值)
*
*@return 格式化后的数组 店铺-{信息,日期数据}的格式
*@author janing
*/
function data_fromat($origin,$field_default="",){
if(!$field_default||!$origin){return ;}
$temporary=array();
foreach ($origin as $shopIndex => $shopValue) {
$shop_id=$shopValue[$field_default[0]];
if(!isset($temporary[$shop_id])){
$temporary[$shop_id]=array();
foreach ($field_default as $field_index => $field) {
//公共字段插入
$temporary[$shop_id][$field]=$shopValue[$field];
}
//新建每日数据字段
$temporary[$shop_id]['dataPre']=array();
}
//其余字段插入 dataPre
$dataPreChild=array();
foreach ($shopValue as $field_index => $field) {
if(in_array($field_index,$field_default) ){continue;}
$dataPreChild[$field_index]=$field;
}
array_push($temporary[$shop_id]['dataPre'],$dataPreChild);
}
//对象转数组
$temporary_arr=array();
foreach ($temporary as $key => $value) {
array_push($temporary_arr,$value);
}
//var_dump($temporary_arr);exit;
return $temporary_arr;
}
Vue-cli 初探
参考:https://segmentfault.com/a/1190000009151389
vue-cli 是什么
平时如果自己配环境Vue+webpack会十分麻烦还容易出错,然而vue-cli就是vue搭配各种工具的配置包。
这里说说Vue-cli搭建的步骤。
详细搭建流程
前提
- 一切的前提是,你已经安装好了node+npm,并且还有vue基础。否则请回官方文档恶补。
- 因为墙的厚度,所以你需要npm换源:http://www.jianshu.com/p/0deb70e6f395
- cmd进入项目文件夹(wordspace/www/projects怎么写都行)
构建项目
命令行全局安装 vue-cli
npm install -g vue-cli
在项目文件夹下新建项目
命令行运行
vue init webpack Project1
这个操作会在wordspace下新建一个project1的文件夹,这就是你新建的项目了。
vue-cli可创建的模板不只webpack还有几个类型:(官方文档)[https://github.com/vuejs/vue-cli#official-templates]
browserify - 拥有高级功能的 Browserify + vueify 用于正式开发。

browserify-simple - 拥有基础功能的 Browserify + vueify 用于快速原型开发。

webpack - 拥有高级功能的 Webpack + vue-loader 用于正式开发。

webpack-simple - 拥有基础功能的 Webpack + vue-loader 用于快速原型开发。

simple - The simplest possible Vue setup in a single HTML file
php 抛送json数据 放置于tp5 common.php 中作为工具函数
function sendinfo($data,$info,$status){
    header('Content-Type: application/json;charset=utf-8');
    $arr = array(
        data => $data,
        info => $info,
        status => $status,
    );
    return $arr
}
webpack 初探
webpack2.4.1记录笔记
前言
本来跟着教程好好的,走着走着发现不对劲,npm执行程序一片通红。猛然醒悟,原来那是webpack1时代的教程。
所以这就促成了这份乱七八糟的手札。
原文:http://www.jianshu.com/p/42e11515c10f
安装环境
本文假设你已经安装了最新版npm和node.js并且熟悉npm管理包的基础操作了。
执行npm install 命令失败,请参考https://npm.taobao.org/,并使用cnpm替代操作。
安装位置
建立空文件夹,我目前使用D:\devserver。
然后有两种方式执行npm
* 进入文件夹在地址栏输入cmd打开命令行。
* C:\windows\system32\cmd.exe 右键管理员运行 依次输入以下命令
//cmd中执行
  > d:
  > cd devserver
安装webpack
//cmd中执行
  //全局安装
  npm install -g webpack
  //或者只安装到项目目录
  npm install --save-dev webpack
--save 和 --save-dev 的区别是:前者应该可用于生产、调试环境,而后者应该只用于调试环境。
准备步骤
回到 d:\devserver,使用npm init可以快速初始化项目。
//cmd中执行
  npm init
依次填写相关信息,即可生成package.json文件。
1.package.json文件准备好后,需要进行安装webpack作为项目依赖包。
//cmd中执行
  npm install --save-dev webpack
2.回到 d:\devserver 新建两个文件夹:app、public。app文件夹添加hello.js、main.js两个文件。public文件夹添加index.html文件。此时文件结构如下:
devserver
├─ node_modules
├─ app (用来存放原始数据和我们将写的JavaScript模块)
│  ├─ hello.js
│  └─ main.js
└─ public (准备给浏览器读取的数据)
   └─ index.html
文件只有最基础的html代码,它唯一的目的就是加载打包后的js文件
Document
hello.js只包括一个用来返回包含问候信息的html元素的函数。
  // hello.js
  module.exports = function() {
  var msg = document.createElement('div');
  msg.textContent = "Hello World!";
  return msg;
  };
main.js用来把hello模块返回的节点插入页面。
  //main.js
  var hello = require('./hello.js');
  document.getElementById('root').appendChild(hello());
此时webpack已经可以正常执行了,一般来说,最基础的命令是
//cmd中执行
  webpack {entry file/入口文件} {destination for bundled file/存放bundle.js的地方}
但是非全局的情况下就是
//cmd中执行
  node_modules/.bin/webpack app/main.js public/bundle.js
配置webpack [手札1]
基础设置
虽然,做到这里 webpack 已经可以直接运行了,但是还有很多选项可以进行配置。
比如需要加入loaders和实时更新的测试服务器webpack-dev-server。
回到d:\devserve , 新建文件 webpack.config.js 。
//webpack.config.js
  module.exports = {
    entry:  __dirname + "/app/main.js",//__ 已多次提及的唯一入口文件
    output: {
      path: __dirname + "/public",//__ 打包后的文件存放的地方
      filename: "bundle.js"//打包后输出文件的文件名
    }
  };
  //__ dirname 是node.js中的一个全局变量
做了这个配置,在命令行执行 webpack 就会按照这个配置执行了。
npm引导执行
重点来了,使用cmd难免会忘记执行哪些程序,所以可以利用package.json/scripts 进行引导任务执行。[手札2]
//package.json
{
...
    "scripts":{
      "start": "webpack"
    }
...
}
以后只需要这样就可以执行该任务了:
此处因为使用了start所以可以简写 npm run star[手札2]
//命令行执行
  npm start
配置调试地图(Source Maps)[手札3]
//webpack.config.js
module.exports = {
   devtool: 'eval-source-map',//配置生成Source Maps,选择合适的选项
   ...
}
使用eval打包源文件模块,在同一个文件中生成干净的完整的source map。这个选项可以在不影响构建速度的前提下生成完整的sourcemap,但是对打包后输出的JS文件的执行具有性能和安全的隐患。不过在开发阶段这是一个非常好的选项,但是在生产阶段一定不要用这个选项。
配置dev-server服务器(热更新)[手札4-待更新]
安装webpack-dev-server
//命令行执行
  npm install --save-dev webpack-dev-server
配置
由于原文中使用旧版webpack,所以配置项都是有问题的,比如colors早就不存在了。
//webpack.config.js
module.exports = {
...
  devServer: {
     contentBase: "./public",//本地服务器所加载的页面所在的目录
     hot: true,//热模块更换
     historyApiFallback: true,//不跳转
     //colors:true,//2.4.1已经放弃了该配置,写了就报错
     inline: true//实时刷新
   }
 ...
 }
运行devServer
这里就重点了,原文并没有告诉我们如何开启服务器。使用命令行如下:
//命令行执行
  webpack-dev-server --hot --inline
如果使用npm引导加载则先配置package.json如下:
//package.json
{
...
  "scripts": {
      "test": "echo \"Error: no test specified\" && exit 1",
      "start": "webpack",
      "dev": "webpack-dev-server --hot --inline"
    },
...
}
//命令行执行
  npm run dev
运行dev服务器后,因为其默认试用8080端口,所以无报错就可以访问http://localhost:8080
使用loaders
这是一个打包必备的东西,读取一种文件进行打包,需要对应的loaders。比如读取json文件需要json-loader ,读取vue需要 vue-loader。
安装json-loader
  //安装JSON的loader
  npm install --save-dev json-loader
由于原文中使用旧版webpack,所以loaders的配置项都是有问题的,可以查阅官方文档-loader-module-name-extension-removed
主要和原文的区别有:
* module.loaders 更改为 module.rules
所以webpack.config.js应该如此配置:[手札5]
//webpack.config.js
module.exports = {
...
module:{
    rules:[
      { test:/\.json$/,loader:'json-loader' }
    ]
  },
...
}
此时我们来试用一下吧。
在 d\devserver\app 创建config.json文件:
//config.json
{
  "info":"I'm JSON!!"
}
修改 hello.js :
//hello.js
var config = require('./config.json');

module.exports = function() {
  var msg = document.createElement('div');
  msg.textContent = config.info;
  return msg;
};
现在页面应该更新为 I'm JSON!!了。
一般loaders的使用方法就是酱紫,但是有些比较复杂的需要另外处理,比如Babel。
Babel
它实际上是好几个模块化的包的集合,它的作用是把es6等未被浏览器大规模支持的js标准转换成es2015标准。babel-core是这些包的核心文件,可以按需加载需要的babel-loaders。用的最多应该是解析ES6的babel-preset-es2015包还有解析JSX的babel-preset-react包。
一次性安装数个依赖包:
//命令行执行
  npm install -save-dev babel-core babel-loader babel-preset-es2015 babel-preset-react
修改webpack.config.js:[手札5]
//webpack.config.js
module.exports = {
  ...
  module:{
    rules:[
      {
        test:/\.json$/,
        loader:'json-loader'
      },
      {
        test:/\.js$/,
        //只能匹配这个地址的js文件
        include:[path.resolve(__dirname,"app")], //__ dirname全局变量
        loader:'babel-loader', //-loader不可以省略(webpack1是可以的)
        //不再用query,改成options了
        options: {
          presets: ['es2015','react']
        }
      }
    ]
  }
  ...
}
babel的配置可能会很复杂,所以提取出来单独配置可能会更好,所以这里新建.babelrc,webpack会自动读取配置内容。
修改webpack.config.js
module.exports = {
  ...
  module:{
    rules:[
      {
        test:/\.json$/,
        loader:'json-loader'
      },
      {
        test:/\.js$/,
        //只能匹配这个地址的js文件
        include:[path.resolve(__dirname,"app")], //__ dirname全局变量
        loader:'babel-loader', //-loader不可以省略(webpack1是可以的)
      }
    ]
  }
  ...
}
新建文件.babelrc
//.babelrc
{
  "presets": ["react", "es2015"]
}
CSS
css-loader 可以使你使用类似于@import 和 url(...)的方法来实现require()的功能。
style-loader将所有文件样式计算后加入页面。
这二者结合能把样式表嵌入webpack打包后的js文件中(bundle.js)
//安装
  npm install --save-dev style-loader css-loader
在d:\devserver\app新建css文件:
//main.css
  html{color:red;}
在main.js引入css文件
//main.js
import './reset.css';

var hello = require('./hello.js');
document.getElementById('root').appendChild(hello());
接下来字应该变红色了。
手札
1.使用webpack.config.js来配置webpack
//webpack.config.js
//注:“__dirname”是node.js中的一个全局变量,它指向当前执行脚本所在的目录。

module.exports = {
  entry:  __dirname + "/app/main.js",//已多次提及的唯一入口文件
  output: {
    path: __dirname + "/public",//打包后的文件存放的地方
    filename: "bundle.js"//打包后输出文件的文件名
  }
}
2.package.json设置npm命令
{
  "name": "webpack-sample-project",
  "version": "1.0.0",
  "description": "Sample webpack project",
  "scripts": {
    "start": "webpack" ,//配置的地方就是这里啦,相当于把npm的start命令指向webpack命令
    "build": "webpack"//npm的start是一个特殊的脚本名称,它的特殊性表现在,在命令行中使用npm start就可以执行相关命令,如果对应的此脚本名称不是start,想要在命令行中运行时,需要这样用npm run {script name}如npm run build
  },
  "author": "zhang",
  "license": "ISC",
  "devDependencies": {
    "webpack": "^1.12.9"
  }
}
3.通过配置devtool来生成source maps 方便调试
| devtool 选项 | 配置结果 |
|---|---|
| source-map | 在一个单独的文件中产生一个完整且功能完全的文件。这个文件具有最好的source map,但是它会减慢打包文件的构建速度; |
| cheap-module-source-map | 在一个单独的文件中生成一个不带列映射的map,不带列映射提高项目构建速度,但是也使得浏览器开发者工具只能对应到具体的行,不能对应到具体的列(符号),会对调试造成不便; |
| eval-source-map(开发阶段建议) | 使用eval打包源文件模块,在同一个文件中生成干净的完整的source map。这个选项可以在不影响构建速度的前提下生成完整的sourcemap,但是对打包后输出的JS文件的执行具有性能和安全的隐患。不过在开发阶段这是一个非常好的选项,但是在生产阶段一定不要用这个选项; |
| cheap-module-eval-source-map | 这是在打包文件时最快的生成source map的方法,生成的Source Map 会和打包后的JavaScript文件同行显示,没有列映射,和eval-source-map选项具有相似的缺点; |
4.使用webpack构建本地服务器
安装webpack-dev-server
//命令行执行
  npm install --save-dev webpack-dev-server
配置
由于原文中使用旧版webpack,所以配置项都是有问题的,比如colors早就不存在了。
其他配置暂时挂起懒得找。
//webpack.config.js
module.exports = {
...
  devServer: {
     contentBase: "./public",//本地服务器所加载的页面所在的目录
     hot: true,//热模块更换
     historyApiFallback: true,//不跳转
     //colors:true,//2.4.1已经放弃了该配置,写了就报错
     inline: true//实时刷新
   }
 ...
 }
运行devServer
这里就重点了,原文并没有告诉我们如何开启服务器。使用命令行如下:
//命令行执行
  webpack-dev-server --hot --inline
如果使用npm引导加载则先配置package.json如下:
//package.json
{
...
  "scripts": {
      "test": "echo \"Error: no test specified\" && exit 1",
      "start": "webpack",
      "dev": "webpack-dev-server --hot --inline"
    },
...
}
//命令行执行
  npm run dev
5.loaders 配置
详细请点击参考文档。
一般情况下loaders配置只需要写test:名字正则匹配,loader:"加载器名称"
const path = require('path');
module.exports={
  ...
  module: {
    // 关于模块配置

    rules: [
      // 模块规则(配置加载器、解析器等选项)
        {
          test:/\.json$/,
          loader:'json-loader',
          include: [
          path.resolve(__dirname, "app") //__ dirname全局变量
          ],
          exclude: [
            path.resolve(__dirname, "app/demo-files") //__ dirname全局变量
          ],
          // 这里是匹配条件,每个选项都接收一个正则表达式或字符串
          // test 和 include 具有相同的作用,都是必须匹配选项
          // exclude 是必不匹配选项(优先于 test 和 include)
          // 最佳实践:
          // - 只在 test 和 文件名匹配 中使用正则表达式
          // - 在 include 和 exclude 中使用绝对路径数组
          // - 尽量避免 exclude,更倾向于使用 include

          issuer: { test, include, exclude },
          // issuer 条件(导入源)

          enforce: "pre",
          enforce: "post",
          // 标识应用这些规则,即使规则覆盖(高级选项)

          loader: "babel-loader",
          //可以使用!来使用其中一个加载比如:'style-loader!css-loader'
          // 应该应用的 loader,它相对上下文解析
          // 为了更清晰,`-loader` 后缀在 webpack 2 中不再是可选的
          // 查看 webpack 1 升级指南。

          options: {
            presets: ["es2015"]
          },
        },
        {
          test: "\.html$",

          use: [
            // 应用多个 loader 和选项
            "htmllint-loader",
            {
              loader: "html-loader",
              options: {
                ...
              }
            }
          ]
        }

      ]
    }
  ...
}
原生js平滑滚动 【我写的很菜】
    /**
* 平滑滚动
* @param target[document.Element] 滚动目标
* @param lengthTo[number] 滚动到达
* @param type[string] 滚动x/y轴
* @param callback[function] 滚动后回调
*/
function roll(target,lengthTo,type,callback){
  var type = type || "x";
  var dd = target,
      dnow = (type == "x") ? dd.scrollLeft : dd.scrollTop;
      dmin = 0,
      dmax = (type == "x") ? dd.scrollWidth : dd.scrollHeight,
      dto = (lengthTo > dmin) ? ( ( lengthTo < dmax ) ? lengthTo : dmax ): dmin,
      step = 20,
      distance = Math.abs (dto - dnow),
      count = 1 ,
      direction = (dto > dnow)? 1 : -1 ;
       (function() {
         var timePre = count / step;
         var dnow = (type == "x") ? dd.scrollLeft : dd.scrollTop;
         var speed = Math.floor( distance / step ) ;
         // speed = Tween.Quad.easeIn(1,0, speed * 1.5  , 0.5 + 0.1 * count); //需要有缓动函数支持
         var move = dnow + direction * speed ;

// console.log(distance,speed , move);

         if(timePre > 1 || Math.abs(move - dto ) <= Math.abs(speed)){
           (type == "x") ? target.scrollLeft = dto :  target.scrollTop = dto;
                     if(typeof callback =="function"){
                         callback();
                     }
           return ;
         }
         (type == "x") ? target.scrollLeft = move : target.scrollTop = move;

         count++;
         setTimeout(arguments.callee, 40);
       })();
}
缓动函数计算公式
    /**
* 缓动计算公式
*/
var Tween = {
    Linear: function(t, b, c, d) {
        return c * t / d + b;
    },
    Quad: {
        easeIn: function(t, b, c, d) {
            return c * (t /= d) * t + b;
        },
        easeOut: function(t, b, c, d) {
            return - c * (t /= d) * (t - 2) + b;
        },
        easeInOut: function(t, b, c, d) {
            if ((t /= d / 2) < 1) return c / 2 * t * t + b;
            return - c / 2 * ((--t) * (t - 2) - 1) + b;
        }
    },
    Cubic: {
        easeIn: function(t, b, c, d) {
            return c * (t /= d) * t * t + b;
        },
        easeOut: function(t, b, c, d) {
            return c * ((t = t / d - 1) * t * t + 1) + b;
        },
        easeInOut: function(t, b, c, d) {
            if ((t /= d / 2) < 1) return c / 2 * t * t * t + b;
            return c / 2 * ((t -= 2) * t * t + 2) + b;
        }
    },
    Quart: {
        easeIn: function(t, b, c, d) {
            return c * (t /= d) * t * t * t + b;
        },
        easeOut: function(t, b, c, d) {
            return - c * ((t = t / d - 1) * t * t * t - 1) + b;
        },
        easeInOut: function(t, b, c, d) {
            if ((t /= d / 2) < 1) return c / 2 * t * t * t * t + b;
            return - c / 2 * ((t -= 2) * t * t * t - 2) + b;
        }
    },
    Quint: {
        easeIn: function(t, b, c, d) {
            return c * (t /= d) * t * t * t * t + b;
        },
        easeOut: function(t, b, c, d) {
            return c * ((t = t / d - 1) * t * t * t * t + 1) + b;
        },
        easeInOut: function(t, b, c, d) {
            if ((t /= d / 2) < 1) return c / 2 * t * t * t * t * t + b;
            return c / 2 * ((t -= 2) * t * t * t * t + 2) + b;
        }
    },
    Sine: {
        easeIn: function(t, b, c, d) {
            return - c * Math.cos(t / d * (Math.PI / 2)) + c + b;
        },
        easeOut: function(t, b, c, d) {
            return c * Math.sin(t / d * (Math.PI / 2)) + b;
        },
        easeInOut: function(t, b, c, d) {
            return - c / 2 * (Math.cos(Math.PI * t / d) - 1) + b;
        }
    },
    Expo: {
        easeIn: function(t, b, c, d) {
            return (t == 0) ? b: c * Math.pow(2, 10 * (t / d - 1)) + b;
        },
        easeOut: function(t, b, c, d) {
            return (t == d) ? b + c: c * ( - Math.pow(2, -10 * t / d) + 1) + b;
        },
        easeInOut: function(t, b, c, d) {
            if (t == 0) return b;
            if (t == d) return b + c;
            if ((t /= d / 2) < 1) return c / 2 * Math.pow(2, 10 * (t - 1)) + b;
            return c / 2 * ( - Math.pow(2, -10 * --t) + 2) + b;
        }
    },
    Circ: {
        easeIn: function(t, b, c, d) {
            return - c * (Math.sqrt(1 - (t /= d) * t) - 1) + b;
        },
        easeOut: function(t, b, c, d) {
            return c * Math.sqrt(1 - (t = t / d - 1) * t) + b;
        },
        easeInOut: function(t, b, c, d) {
            if ((t /= d / 2) < 1) return - c / 2 * (Math.sqrt(1 - t * t) - 1) + b;
            return c / 2 * (Math.sqrt(1 - (t -= 2) * t) + 1) + b;
        }
    },
    Elastic: {
        easeIn: function(t, b, c, d, a, p) {
            if (t == 0) return b;
            if ((t /= d) == 1) return b + c;
            if (!p) p = d * .3;
            if (!a || a < Math.abs(c)) {
                a = c;
                var s = p / 4;
            } else var s = p / (2 * Math.PI) * Math.asin(c / a);
            return - (a * Math.pow(2, 10 * (t -= 1)) * Math.sin((t * d - s) * (2 * Math.PI) / p)) + b;
        },
        easeOut: function(t, b, c, d, a, p) {
            if (t == 0) return b;
            if ((t /= d) == 1) return b + c;
            if (!p) p = d * .3;
            if (!a || a < Math.abs(c)) {
                a = c;
                var s = p / 4;
            } else var s = p / (2 * Math.PI) * Math.asin(c / a);
            return (a * Math.pow(2, -10 * t) * Math.sin((t * d - s) * (2 * Math.PI) / p) + c + b);
        },
        easeInOut: function(t, b, c, d, a, p) {
            if (t == 0) return b;
            if ((t /= d / 2) == 2) return b + c;
            if (!p) p = d * (.3 * 1.5);
            if (!a || a < Math.abs(c)) {
                a = c;
                var s = p / 4;
            } else var s = p / (2 * Math.PI) * Math.asin(c / a);
            if (t < 1) return - .5 * (a * Math.pow(2, 10 * (t -= 1)) * Math.sin((t * d - s) * (2 * Math.PI) / p)) + b;
            return a * Math.pow(2, -10 * (t -= 1)) * Math.sin((t * d - s) * (2 * Math.PI) / p) * .5 + c + b;
        }
    },
    Back: {
        easeIn: function(t, b, c, d, s) {
            if (s == undefined) s = 1.70158;
            return c * (t /= d) * t * ((s + 1) * t - s) + b;
        },
        easeOut: function(t, b, c, d, s) {
            if (s == undefined) s = 1.70158;
            return c * ((t = t / d - 1) * t * ((s + 1) * t + s) + 1) + b;
        },
        easeInOut: function(t, b, c, d, s) {
            if (s == undefined) s = 1.70158;
            if ((t /= d / 2) < 1) return c / 2 * (t * t * (((s *= (1.525)) + 1) * t - s)) + b;
            return c / 2 * ((t -= 2) * t * (((s *= (1.525)) + 1) * t + s) + 2) + b;
        }
    },
    Bounce: {
        easeIn: function(t, b, c, d) {
            return c - Tween.Bounce.easeOut(d - t, 0, c, d) + b;
        },
        easeOut: function(t, b, c, d) {
            if ((t /= d) < (1 / 2.75)) {
                return c * (7.5625 * t * t) + b;
            } else if (t < (2 / 2.75)) {
                return c * (7.5625 * (t -= (1.5 / 2.75)) * t + .75) + b;
            } else if (t < (2.5 / 2.75)) {
                return c * (7.5625 * (t -= (2.25 / 2.75)) * t + .9375) + b;
            } else {
                return c * (7.5625 * (t -= (2.625 / 2.75)) * t + .984375) + b;
            }
        },
        easeInOut: function(t, b, c, d) {
            if (t < d / 2) return Tween.Bounce.easeIn(t * 2, 0, c, d) * .5 + b;
            else return Tween.Bounce.easeOut(t * 2 - d, 0, c, d) * .5 + c * .5 + b;
        }
    }
}
函数 自调用 arguments.callee
    (function() {
      lengthNow -= step;
      if (lengthNow > -step) {
          lengthNow.scrollTop = lengthNow;
          setTimeout(arguments.callee, 20);
      }
  })();
box-sizing 导致的宽高问题原理
来源:http://www.cnblogs.com/huangyin1213/p/6245109.html
css3的Sizing
Box-sizing是css3的box属性之一,遵循css的boxmodel原理,css中box model是分为两种,第一种是w3c的标准模型,另一种是ie的传统模型,他们相同之处都是对元素极端的模型,具体说就是对元素的width,height,padding,border以及元素实际尺寸的计算关系。
w3c的标准box model
外盒尺寸计算(元素控件尺寸)
Element空间高度 = content height +padding+border+margin
Element空间宽度 = content width +padding+border+margin
内盒尺寸计算(元素大小)
Element Height = content Height+padding+border(height为内容的高度)
Element Width = content Width +padding+border(width为内容的宽度)
ie传统下Box Model(ie6一下,不包括ie6版本)
外盒尺寸计算(元素空间尺寸)
Element空间的高度 = content heigth +margin(height包含了元素内容宽度,边框宽度,内距宽度)
Element空间的宽度 = content Width +margin(Width包含了元素内容宽度,边框宽度,内距宽度)
内盒尺寸计算(元素大小)
Element height = content height (height包含了的元素内容高度,边框高度,内距高度)
Element Width = content width(width包含了元素内容宽度,边框宽度,内距宽度)
box-sizing属性定义盒元素尺寸的计算方法:
content-box:默认值,计算方法为width/height = content,表示指定的宽度和高度仅限内容区域,边框和内边距的宽度不包含在内
padding-box:计算方法为width/height = content+padding,表示指定的宽度和高度包含内边距和北荣区域,边框宽度不包含在内
border-box:计算方法为width/height = content+padding+border,表示指定的w/h包含边框,内边距和内容区域。
inherit:表示继承父元素中box-sizing属性的值
正常情况下offsetWidth,offsetHeight获取元素的尺寸是足够了,但是某些元素比如SVG,MathML返回尺寸出错(这里不考虑),css3增加了一个box-sizing选择盒子模型,于是jquery里面就引入了augmentWidthOrHeight这个方法来处理因为box-sizing设置导致的问题,augmentWidthOrHeight这个方法其实就是对盒子模型的一个处理,所以jquery获取一个元素的w/h都是,ele.offsetW/H+augmentHeight方法也可以。